How to Use BeeTV on PC (Windows & MAC) – Ultimate Guide
BeeTV on PC is providing its audience with the content that they desire after the shutdown of Terrarium. It has a modern and smooth interface for the convenience of the audience. Even a user with the least technical knowledge can use this application easily. It gives users access without any subscription, so there is no need to sign in/sign up.

Users will get different streaming links with a single click. They will have complete control over content quality and subtitle choices. Moreover, this lightweight application is compatible with all types of devices. Whether you are an Android or iOS user or a fan of big screens (Windows, MAC, Firestick, Nvidia Shield), you can simply get used to it. Keep reading this article to get information about the requirements and how-to-use guide for PC/Laptop (Windows 11/10/7 & MAC).
Requirements to Get Bee TV on PC
There are two simple requirements to get BeeTV on PC. You can fulfill these requirements in minutes so don’t worry. We will go through a complete guide to get BeeTV on your PC (Windows and MAC).
1- Download the BeeTV APK File for PC
First, you must have a Bee TV APK file to install it on your device. Kindly click on the button below to install the APK file on your device.
2- Android Emulator to get BeeTV for Windows & MAC
The BeeTV App is primarily for small-screen users. To get this application, you will need to install an Android Emulator on your PC (Windows & MAC). You can install any emulator that is compatible with your device. But, we recommend you install “BlueStacks” or “NoxPlayer.” These are lightweight emulators, just like the BeeTV App. Please install one of them and then go through the installation process to get the application on your device. Below are the guidelines for successfully installing these emulators on your device.
Requirements for Installing an Android Emulator

Disk Space
Hard disk drive (HDD) having 5GB of free space

Storage Space
Minimum 2GB of free Storage Space for download.

Operating System
Microsoft Windows 7 & above

RAM
Must have 4GB of RAM to work smoothly

Appropriate OS
Select Appropriate Operating System (OS), e.g., Windows or MAC

Updated Graphics Card
Update your Graphics Card if it is not updated. (Mainly for NoxPlayer).

Turn Off Anti-Virus
Turn off the Anti-Virus in case of any conflict (Mainly in NoxPlayer).

Extractor Tool
An extractor tool, e.g., WinRAR, to extract a Zip File (In case you have downloaded a Zip File).
How to Install BlueStacks Emulator for BeeTV on PC
- Download the BlueStacks Android Emulator from the official website to get the BeeTV APK App.

- Select “Customize Installation” and specify a location in your drive.

- Select the above option if you want to download and install BlueStacks in a specific folder. (Otherwise, it will install in C-Drive automatically)
- After selecting the specific location, click on “Install Now.”
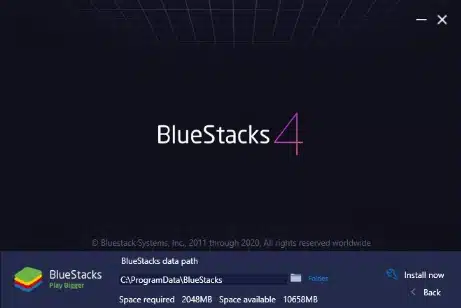
- BlueStacks will start downloading and will install automatically after completion.

- After installation, launch the emulator and link your “Google Account” to start using it.

How to Install NoxPlayer Emulator for BeeTV on PC
- Download the NoxPlayer Emulator from the official website to get the BeeTV APK App.

- Open the downloaded file and select the path where you want to install it by clicking on “Browse.”
- After selection, Click on “Install” to start the installation process.

- The installation will start, and NoxPlayer will install on your device after some time.

- Launch the emulator by clicking on the “Start” Button.

- It will ask for login details; simply connect your “Google Account.”
Note: Remember to turn on “Install Unknown Sources” in the emulator’s “Settings”. (In case you encounter problems with BeeTV APK installation)
How to Use BeeTV on PC (Windows 11/10/7 & MAC)
Frequently Asked Questions
Conclusion
BeeTV on PC is a unique and premium streaming application that comes with a lot of features combined. You can install this application on your PC (Windows 11/10/7 & MAC). You need an Android emulator to install it on your device. Please go through the complete BeeTV Download and Install Process using an emulator. Moreover, we have provided the requirements for installing an emulator above. Also, the FAQs section will help with your queries, e.g., BeeTV alternative for Windows. Please follow the same process to install it successfully. Don’t be shy to Contact us if you are facing any issues.